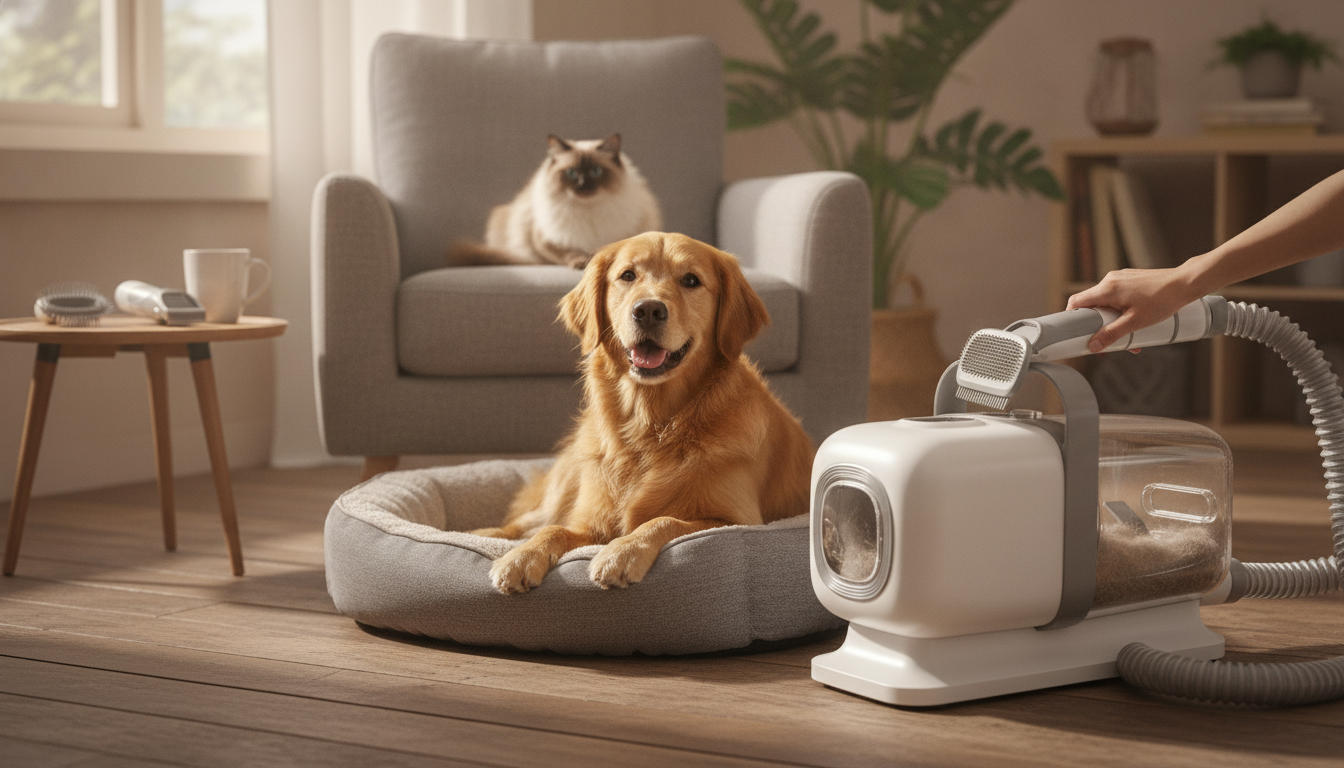
What a Vacuum Grooming Kit Does During a Full Session
A pet grooming kit with a built-in vacuum is designed to make at-home grooming feel more like a tidy, repeatable routine instead of a fur-covered event. Rather than brushing or clipping first and cleaning up later, suction captures loose hair as it’s removed, helping keep floors, furniture, and clothing noticeably cleaner—especially in homes with heavy shedders.
Most sessions follow a simple workflow. Start by detangling and removing loose undercoat with a shedding brush. Next, use clippers to trim and shape as needed (or focus only on hygiene areas). Finish with a quick pass to pick up remaining loose hair from the coat surface. This order matters because clippers work best when the coat is brushed out, and suction works best when tools stay in steady contact with the fur instead of bouncing over mats.
Many vacuum grooming systems also emphasize low-noise operation compared with a typical household vacuum. While “quiet” is relative, a softer sound profile and adjustable suction can make pets less likely to bolt, freeze, or fight the process—especially when they’re introduced gradually.
Key Components and How Each One Helps
Multi-tool kits vary, but most include a vacuum base, hose, and grooming heads that connect directly to suction. The vacuum does the collection work while the brush or clipper performs the grooming at the coat surface.
- Vacuum base and hose: Provides suction that pulls shed hair into a container, reducing fur drift and keeping the grooming area cleaner.
- Clippers: Useful for trimming body hair, shaping, and cleaning up hygiene areas. Best results come from clean blades and a fully dry coat.
- Shedding brush: Helps lift loose undercoat and surface hair, reducing tangles, matting, and day-to-day shedding around the house.
- Attachments and comb guides: Guard combs help control coat length for safer, more consistent trims—especially helpful when learning.
- Collection bin and filters: Capture hair and dander; easy-empty bins make frequent cleanouts faster and less messy.
Common Grooming Tools and Where They Fit in the Routine
| Tool |
Best for |
Tips for comfortable use |
| Shedding brush |
Daily/weekly de-shedding and loose-fur removal |
Use short strokes with light pressure; stop if skin looks pink or irritated |
| Clippers |
Trimming length, shaping, hygiene areas |
Start with a longer guard; keep blades cool and clean; trim on dry, brushed hair |
| Vacuum suction (with grooming head) |
Capturing fur during brushing and trimming |
Begin on the lowest setting; let the pet sniff the handle and hear the motor at a distance first |
| Comb/finishing brush |
Final check for tangles and evenness |
Comb from ends to roots; avoid pulling through mats |
Low-Noise Operation: What It Means for Anxious or Noise-Sensitive Pets
Low-noise operation generally comes from quieter motors, better airflow design, and multiple suction settings. For pets that startle easily, being able to begin on a gentle setting can make the difference between a workable routine and a stressful struggle.
Noise is only one part of the experience. Some pets react more to vibration, the sensation of airflow, or being held in place. A calm introduction usually matters as much as the sound level: start with short sessions, pair the tools with treats, and stop while your pet is still coping well. Grooming in a familiar room with non-slip footing can also improve confidence and safety.
For general grooming guidance and handling considerations, authoritative resources like the American Veterinary Medical Association (AVMA) Pet Care, the American Kennel Club (AKC) dog grooming tips, and the ASPCA cat grooming tips offer helpful, species-specific best practices.
How to Use a Vacuum Grooming Kit Safely and Effectively
- Prep the coat first: Brush out tangles before turning on suction or using clippers. Clippers glide more smoothly on a clean, fully dry coat.
- Start with deshedding: Use the shedding brush in the direction of hair growth. Avoid repeated passes over the same spot—over-brushing can irritate skin.
- Trim in stages: Begin with a longer guard comb and shorten gradually only where needed. This reduces the chance of clipping too close.
- Watch blade temperature: Blades can warm up during use. Pause to cool the blade (or swap blades) if it feels hot to the touch.
- Protect sensitive zones: Use extra care around ears, armpits, belly, tail base, and paw pads. Keep skin gently taut and use small, controlled strokes.
- Maintain airflow: Empty the bin and clean filters regularly. Strong, steady airflow helps suction performance and can reduce odors.
- Stop if irritation appears: Redness, bumps, flinching, or sudden sensitivity are signs to pause and reassess technique, tool choice, or coat condition.
How to Choose the Right Setup for Coat Type and Household Needs
The best vacuum grooming kit is the one that matches your pet’s coat and your household’s day-to-day reality—space, time, tolerance for noise, and how often grooming happens.
Care and Upkeep to Keep Performance Steady
FAQ
Is a vacuum grooming kit safe for cats and dogs?
Yes, when used properly: start with low suction, introduce the sound gradually, and avoid directing suction near the face and ears. Watch for stress signals (trembling, panting, hiding, swatting) and stop if fear escalates or skin irritation appears.
How often should deshedding and trimming be done at home?
For many pets, weekly brushing is a good baseline, with more frequent deshedding during seasonal coat blows or for heavy shedders. Trimming is usually “as needed” based on coat growth and hygiene; severe matting is safer to address with a professional groomer or veterinary guidance.
Why do clippers sometimes pull hair instead of cutting smoothly?
Hair pulling is commonly caused by dull or dirty blades, a wet or tangled coat, the wrong guard length, moving too fast, or overheating blades. Brush and dry the coat fully, clean and cool the blades, start with a longer guard, and maintain blades (including oiling if recommended) for smoother cutting.
Recommended for you


Leave a comment